Showing posts with label Handyman tips. Show all posts

Thursday, May 9, 2019

After twelve years, it is time to check a few things.

Unit Inspection Program
Is my water heater Ok?

Should my expansion tank be replaced?

Are there leaks around my windows?

Are there any potential fire hazards in my unit?


These are just a few questions that will be answered after a unit inspection.  The purpose of the inspection is to let owners know what to repair, replace, or maintain to avoid costly incidents in the future.

The inspection will be offered at no cost to unit owners.  Twenty minutes is all that it will take to complete critical observations. Each unit owner will receive a private report with recommendations.

We plan to deliver the program in mid-June.  Letters will be mailed to owners explaining the program. Residents need not be present, but, are encouraged to participate.

The timeline and details will be forwarded in a few weeks.

We just ran a pilot with three units and have discovered a few unexpected problems. 

900 Marshy Cove Board of Directors and Sentry Management.


Monday, May 22, 2017

Special message for 700 Cattail Cove and 900 Marshy Cove

Expansion Tank failures

I apologize in advance for  “too-much-information”; but, this is conclusive.
Working with Mid-Shore Plumbing, the cause of expansion tank failures has been verified.
The tanks have three major parts.
*The upper hemisphere
*The lower hemisphere
*The Rubber bladder
The upper and lower halves are separated by the expandable bladder.
If not properly pressurized, the bladder stretches and breaks allowing the water to fill the upper half. 
The lower half interior is glass lined which prevents rust.
The upper half is unprotected steel which rusts when exposed to water.
It is possible that many bladders have failed immediately after installation.
Mid-shore Plumbing cut this tank in half to see what is happening.
Even thought the tank has not rusted through and leaked, it has failed
Photos.

Looking toward the lower half it can been seen that the black bladder is torn.
The bladder is attached at the middle of the tank.
It is designed to keep the water below and expand if necessary.
Note that the lower half shows no rust inside since it is glass lined to prevent corrosion.
The upper half was exposed to water and is rusting.
It may take many months to finally leak.
This tank looked perfect from outside.
The welded seam is where the upper and lower halves are joined.
The indent is where the bladder hoop is attached.
Bottom line: Even of properly installed, replace every 4-5 years.
Make sure your installer pressurizes the tank to match the water pressure in your unit.
Pressures vary from floor to floor, 
(900 MC 4th floor was 45 PSIG.)( 700 CC, 2nd floor, 55 PSIG.)
A simple check to see if your bladder is broken:
Unscrew the blue cap on top of the tank.
Push the air valve button quickly.
If water squirts out , the bladder has definitely failed.

Mid-Shore Plumbing: 
206 Market Square
Cambridge, MD  21613
410-228-9003

Comments: Send them to mc900@comcast.net 

Tuesday, April 11, 2017

Window Blinds: Do you need any?

An owner here at 900 Marshy Cove has a complete set of window blinds available. The blinds are from a Dorchester Unit.  Given their good condition, he would hate to trash them..
Will they fit other units' windows? Maybe, It's worth checking.

  • One set is the double wide for the second bed room
  • The other four are for the other four single wide windows
Bruce M can be contacted by email at mc900@comcast.net

~~~~~~~~~~~~~~~~~~~~~~ 
DH Pool Opens Memorial Day weekend! 
See you in the shallow end.
Wrist bands available at Sentry.


Thursday, April 6, 2017

Back to Expansion tanks

Here's a video on Youtube regarding the proper installation of an expansion tank.


or 


Comments? Questions? send them to mc900@comcast.net

Friday, July 29, 2016

How to save on your Delmarva Electric Bill

Many of you may already know about this program. My unit has been on this program for 3 summers.  You will never notice the difference.

Most peak periods occur during week days on the hottest days of summer.
I recommend the exterior control box called a Digital Cycling Unit (DCU).


Shave $30 to $80 off your Air conditioning bill.

Watch the video.  https://energywiserewards.delmarva.com/md/index.php 

Energy Wise Rewards is a tool for Maryland customers to take more control over your energy usage, save money on your energy costs, and take a big step towards a more sustainable lifestyle.

Demand for electricity in Maryland is rapidly rising. During the "peak demand" times of summer, Energy Wise Rewards works to reduce electricity usage by "cycling" central air conditioners throughout the region, averting power outages, and reducing the need for costly, new electrical infrastructure.
There are no hidden costs or fees, and the program is completely voluntary. Because your participation is so important, we are offering this critical program at no charge, complete with valuable incentives. Joining is a choice that not only benefits you personally, but benefits your community and environment as well.
Enroll now by choosing your participation level and energy-saving device. You'll receive a one-time installation credit, Monthly Reward Bill Credit, and your choice of Energy-Saving Devices at no charge!

LEARN MORE:


send you comments to mc900@comcast.net

Wednesday, June 1, 2016

Annual Service for your Air Conditioning System, 2016

The units at 900 Marshy Cove and 700 Cattail Cove should to be serviced every year.

  • In June, you should pour a cup of bleach down the condensate drain.
  • Spring and Autumn are good times to change your air filter.

During the season, condensation from the coiling coils can support the growth of "biological crud" in the drain. The bleach should clear any developing blockage. Failure to clear a blockage will result in an overflow and potential water damage to your unit and units below.

How it works: (This description varies with your condo floor plan.)

  • Your air conditioning system has three primary components:
    • The  Compressor which is in the garage or outside
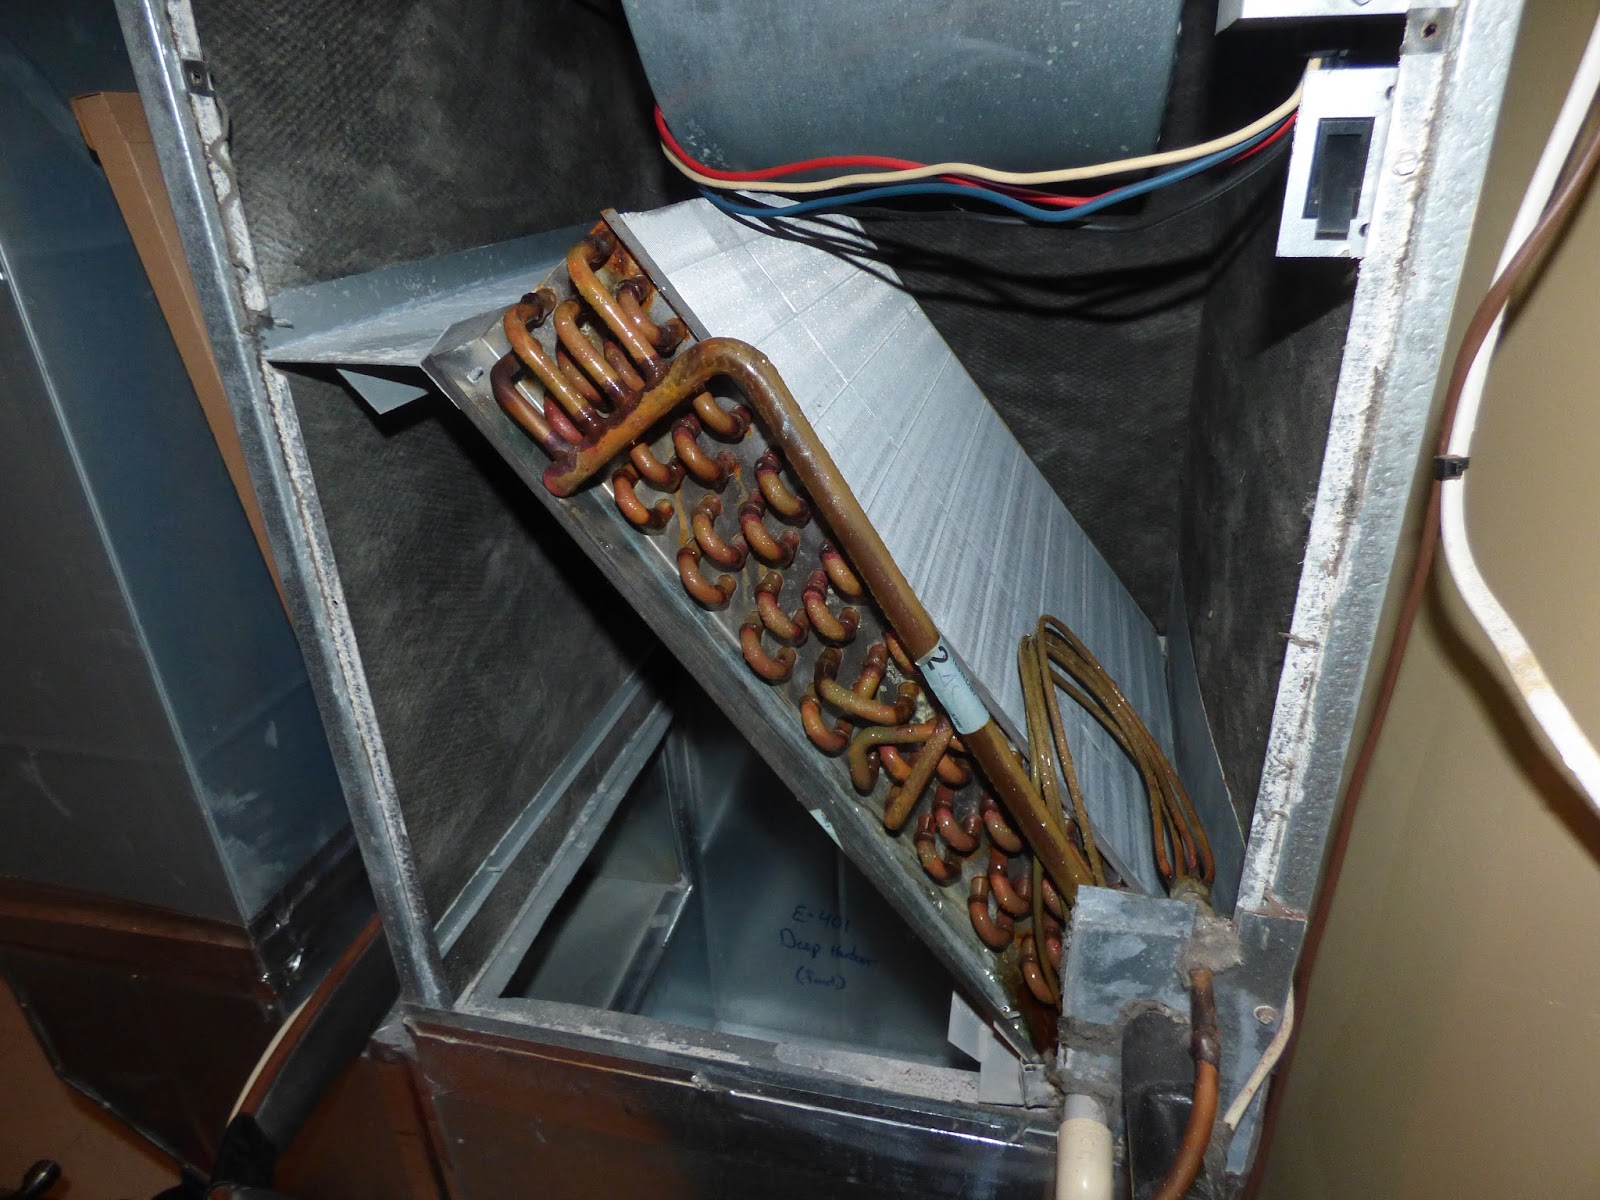
    • The Coiling Coil also called the Evaporator Coil in your duct work located in your laundry room or utility closet.
    • The tubing that connects the two units
Primary drain is on the right. note trap at  bottom that where crud builds up. The left pipe is the overflow.

Remove cap. Slowly pour the bleach in here. 

  • The condensate drain pipes are located in your unit in your laundry room or utility closet
    • There are two white PVC pipes coming out of the duct work. (see photos)
    • One is the primary condensate drain. Its purpose is to drain the condensed humidity away and out of your unit and out of the building. It has several bends and an access cap.
    • The second pipe is a back-up or overflow drain which directs excess water to an overflow pan at the bottom of the duct assembly. If you see water in this visible pan, you have a problem with your primary drain. 
    • The back-up pan has a float switch which should shut down your system if it is full. 
  • The copper tubes that connect both units run through the building, Under normal operation, one is hot and one is cold. A pin-hole leak may mean full replacement.  Usually these lines are durable enough to last for years. Most leaks occur at the connections. 
Simple checks: Do this on a warm day
  • Turn your conditioner on. Set the thermostat a few degrees lower. Are you getting cool air blowing out of your registers? Check your room temperature, It it going down? How long does it take to get to the cooler setting. use a good thermometer to check.
Ceiling register
  • Find your compressor in garage or outside. They are labeled. The fan should be blowing warm to hot air. That's the heat the AC is removing from your unit. Compare with other operating compressors. If the air is cool, you may have a problem.
Solutions:
  • The unit owner is responsible for the maintenance and repair of all air conditioning equipment.
  • You may select any HVAC service company.
  • We have experience with Black Water Heating and Air Conditioning, 
    • 4364 Egypt Rd., Cambridge, MD 21613, (410) 221-0180
  • Standard service should be less than $100.  Full recharge of gas up to $300.
  • Contact Sentry Management if you need more assistance. (410)221-0398
  • Get a good thermostat. The Trane thermostats that Beazer installed are mediocre (cheap). Honeywell makes the best on the market. Use time schedules to save money. 
Electronic Thermostat. 
  • When you leave the unit do for an extended period in the summer, set the AC to 78-80. It will minimize humidity. 
  • Subscribe to the power companies "peak savings program". Have them put the "peaking switch" on the AC unit. Using their thermostat can affect heating. One winter, they shut off our heating units of course by accident. That was fun.
  • For the handy man: The best check is to check the coil box temperature. Open it up, insert a thermometer, then close it. Let the unit run for 10 minutes, then remove the thermometer. 55 degrees or less is good. I use a radio remote thermometer which you can buy at Radio Shack or most hardware stores.
The inner workings. This is the cooling coil. This chamber should be 55 degrees or less.
Stay Cool, Uncle George

Monday, December 21, 2015

Expansion Tanks. Results of Unit Inspections.

On Tuesday, December 15, 2015, expansion tanks were checked in each unit at 900 Marshy Cove.
At least three units were in need of replacement.
Each owner was contacted and all plan to replace their tanks.

Here are some photos of one of the tanks.
WOW! ANY DAY NOW!


It is recommended that these tanks are replaced every 4-5 years.

Questions? 
Contact Sentry 


Tuesday, February 10, 2015

Water Heater: More information on how it works.

Information on our water heaters:
This is a story about your water heater and how it works.

Let's start with the main water shut-off. Do you know where yours is located? Look in you utility room. You should see a square access cover a near eye level. If you pull on it, the shut-off valve is revealed. Knowing where it is and how to close the valve could save you hundreds of dollars of water damage.

To shut off all of the water to your unit, turn it perpendicular to the pipe. The one below is shown OPEN.


Our next stop is the water heater. the water heater does two jobs. It supplies hot water to your spigots and also recirculates water to a heating unit located in your utility room.

Your heating unit is a hot water fan-coil unit located in the duct-work in the utility room. Fan-coil means exactly that. A fan blows air across the hot water coils and forces it through the ducts to your room registers. The same fan also blows air across another coil used for air conditioning in summer.

The water heater in your closet heats the water and maintains the tank temperature all year long. The water temperature can be adjusted but it really only affects the recirculated water that flows to the fan-coil unit. Gas is used to heat the water.


On the tank, you will see the recirculate inlet and outlet connection on the right hand side.


On the top you will find the cold-water inlet and hot-water outlet. SHut valves can be used in summer to prevent hot water going to the heater coil.

A high pressure relief valve is located on the front. Its job is to prevent the tank from erupting in case of a control malfunction. The plastic pipe leads the water down to a catch pan that is expected to minimize flooding in the event of a malfunction. NEVER stopper the relief pipe.

The temperature of hot water in the recirculating tank can be adjusted from the front control display. (OK, ask somebody if you're not sure that you know what you're doing.)

(This will not make your spigot water hotter. I'll get to that later.)

Find the operator manual. read it. .......

Now that you have read the manual, check the current setting. Press, both the "HOTTER" and "COLDER" at the same time, now you can adjust the RECIRCULATING WATER TEMPERATURE. Chances are you do not need to change it. Unless you are unhappy with your heater's response, you should not touch it.  You can lower the setting in summer. Please note, that it need not be higher than A. Someone in the building had it adjusted it to "C" and the heater popped its high pressure relief valve. Water. water, everywhere.

Recirculating water temperature control: It controls water that goes to the heater and the holding tank.


The hot water temperature for you spigots is controlled by MIXING VALVE above the water
heater.
 Since the water exiting the heater is too hot for skin contact, it is mixed with cold water. On one side cold water enters. On the other side, hot water enters from the water heater. The water that exits the mixing value is delivered to your spigots, shower heads, and washing machine. In most municipalities these safety mixing valves are required by code.

The spigot water temperature can be adjusted by turning the knob on the valve. Any adjustment should be made in small increments. This device is meant to prevent burns. Once again, read the manual.


HOT = Copper left

COLD = Copper Right

Hot Tap Water = Bottom to plastic pipe


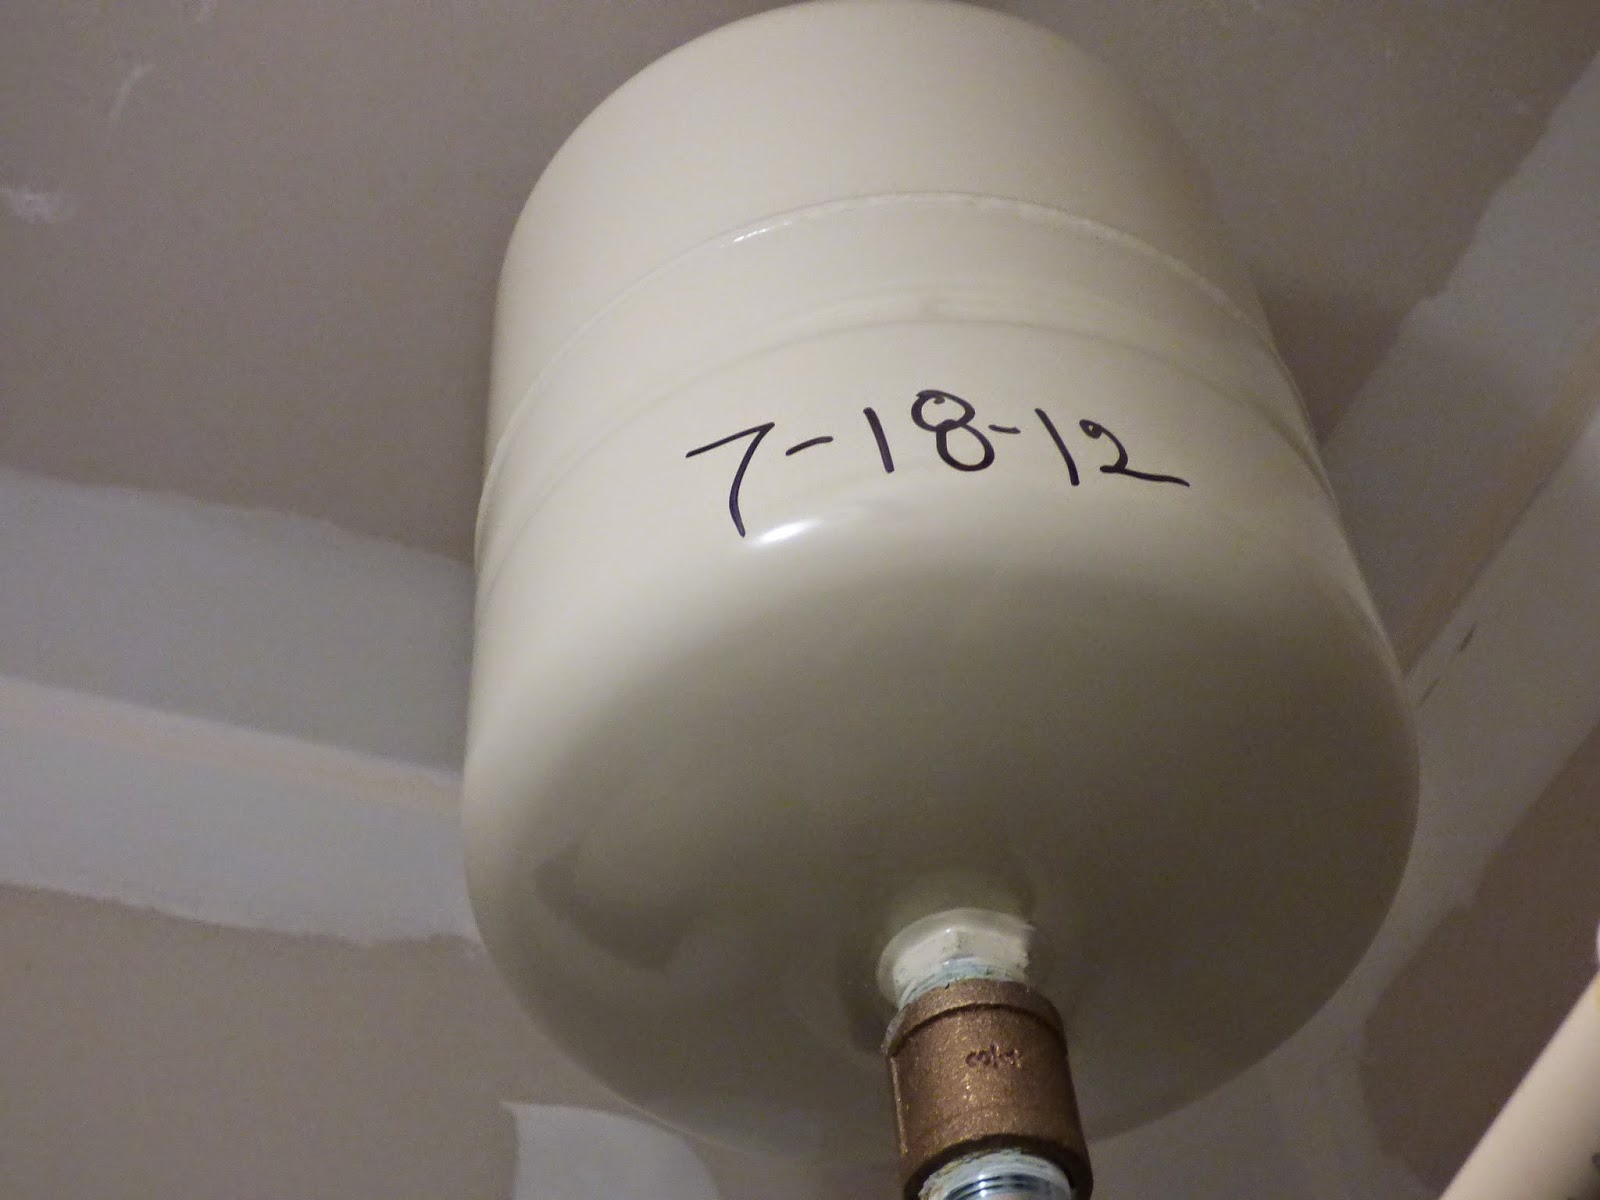
Expansion Tank

This is the weakest link in the system.  This is a simple and inexpensive device. It purpose is to accommodate the expansion of the water and trapped air in the recirculating water lines.  Why it leaks after several years speaks to the quality of the tank's lining.  The tanks is easily replaced. Screw it off, screw on a new one.


This is mine,  Good for another two years, I hope.

Safety Concerns with Natural Gas:

Lastly, remember that we are burning gas all year long for hot water and heat in the winter. Gas is safe if all of the equipment is in proper working order. Your heater is equipped with a flame-safeguard control that will shut-off the gas is the flame is lost.


Go one step further, get a Carbon-Monoxide Gas Detector. Locate it nearby the water heater closet. Many people are asphyxiated by malfunctioning gas furnaces every year.

Best Regards, Uncle George


Send you letters to mc900@comcast.net


When will yours fail? The clock is ticking!

Below are photos of expansion tanks that were replaced after springing leaks.

Just this past week, the owner of Unit 104 had no heat.  Why? Because a slow leak from their expansion tank was dripping on the electronics atop the main tank. These folks were lucky.
They only had to replace their heater.  The complication is that the installed A.O. Smith Promax heaters have been discontinued. No replacement parts are available.  Cost? about $3000

On a previous failure, a leaky expansion tank caused damage to the owner's unit and the units below. Guess who was liable?  Yes, the unit owner with the leak.

In July, 2012, replacement service was offered. Not everybody took advantage.  The cost was under $200.  Talk about an ounce of prevention! 

Mid Shore Plumbing has provided pictures of expansion tanks they removed previously. You will see from the photos that these tanks could have burst at anytime. This is even more of a reason for each and every owner to replace theirs. It was also recommended that these tanks be replaced every four years as a precautionary measure.
For replacement, contact Mid Shore Plumbing directly at 410/228-9003. They will not be available until February 23, 2015; but, you can leave a message.
~~~~~~~~~~~~~
Do not take this advice lightly.  A penny today can save a dollar(s) tomorrow............................


This is mine. I believe that it is good until 2016. 
Tick...tick..tock...Drip...drip....drop

Send your comments to mc900@comcast.net

Sunday, September 26, 2010

Painter

At last we received a reference for a house painter.

Welsh's Painting Service
(240) 876-1033

Have any other references?
Send your comments to Mc900@comcast.net

Sunday, August 8, 2010

Wasting Water: DrIp, Drip, Drip

Wasting Water by Uncle George

If you hear a dripping noise at night and have checked your faucets, that dripping may be your toilet tank leaking. It is unusual for new fixtures to begin leaking in less than two years; however, I found both of my toilet tanks leaking. The cure is simple. Replace the flapper in the tank.
The flapper is the part that the chain pulls to allow the water to flow into the bowl.
On a closer look, I noticed that both flappers were warped on the sealing edge permitting leakage. Since we all have the same fixtures, it is probable that others will discover leaks as I did. How do you know if it’s leaking?
One way to detect the leak is hearing it. The sound will keep you awake at night with worry that a flood is eminent: a dry version of water torture.
Another sign is the occasional inrush of water as it opens the water valve to replace the lost water.
A more scientific way is to shut the water valve that supplies the water to the tank. Turn it off for several hours. (Do not flush the toilet or you will have to start over.) If the tank is empty or lower, you are loosing water due to a poorly sealing flapper. What to do?
Hire a plumber or find a friend that is handy. This is a ten minute job. Going to the hardware store will take longer than the fix.
Do it yourself. Go to that hardware store and buy a flapper replacement kit. It’s a good idea to remove one of the current ones and take it to the hardware store to get a match. Almost any one will work. Personally, I’ve always have had good results with Fluidmaster. Ask the hardware guy if you aren’t sure.
Replacement:
Do one toilet at a time. Just in case a situation of need arises. Also, you can use the other unit as a model while working.

Step One: Remove the tank lid carefully and place it in a safe spot away from your work area - not on the toilet seat. If you drop it, you may need to replace the entire toilet. (Been there, done that!) Close the inlet or “shut-off” valve at the tank. Flush the toilet to empty the tank. Remove flapper and chain from the tank. They are often dirty and black to the touch so use a paper towel or cloth to hold them. The chain can be unclipped from the handle arm. Make note of the chain length and operation of the flush handle.

Step two: Go to the hardware store. Buy two kits. You only need the flapper assembly. Most times the floats are OK. It’s your decision otherwise. ACE is my favorite. True Value, Lowes, Home Depot, and maybe Wal-Mart all have the parts.

Step Three: Figure out how to fasten the flapper so it hinges freely. The kits usually give you a few extra parts to accommodate different manufacturers. See the included photos to see what worked for my fixture. Most of us should have the same fixture.
The ring part on the right was not required for my model.

Step Four: Adjust the chain length. OK, this is where your old part can help. Measure the chain length and clip it so that the action is the same. The chain needs to be just long enough to allow the flapper to close. Try the handle to see if it opens and closes freely.
Step Five: Open the shut-off valve. Wait for the tank to refill. Flush several times and watch to make sure nothing is sticking, binding or tangling. Replace the tank lid. DONE!
Like this article? Hate this article? Have a question?
A printable word document is available by email.
Send me an email
mc900@comcast.net
Uncle George

Tuesday, August 3, 2010

Max Myers Electrician: This guy is good!

One of our readers, G.M., recommended Max Myers for his professionalism as an electrician.
We hired Max to add some light fixtures to kitchen area.
Over the counter, he hung three accent lights.
On the Kitchen ceiling, he mounted a fan
and to replace the "builders grade" florescent fixture,
he installed several recessed lights.
He also added switches to accommodate control of the new fixtures.

Wow! things look better than ever.
Great to work with as he offered some good ideas.
Best of all, he was done in one day.

Thank you again, G. M.

Here is his contact information.
Myers Electric LLC
4226 Beulah RoadHurlock, Md 21643
Master Electrician Max Myers
C: 410-924-0380
FAX: 410-943-1748

Thursday, June 3, 2010

Email from a blog reader

We were looking for a painter which we never found.
However, one resident did write us about an electrician.
Our Thank goes to G. M. of 900.

"I realize you are seeking a house painter, but this electrician is so good, that I think he deserves a recommendation from us to the remainder of the residents of 900 Marshy Cove. His pricing is well under the standard, he does what he says he is going to do when he says he is going to do it, and he cleans up after himself. What else could you want?"

Meyers Electric LLC
4226 Beulah Road
Hurlock, Md 21643
Master Electrician
Max Meyers
C: 410-924-0380
FAX: 410-943-1748


Tell your friends about http://900marshycove.blogspot.com/
share your knowledge, your concerns, your experiences with your neighbors.

Pleeeez write: mc900@comcast.net

Tuesday, January 26, 2010

How it works: your Water heater

This is a story about your water heater and how it works.

Let' start with the main water shut-off. Do you know where yours is located? Look in you utility room. You should see a square access cover a near eye level. If you pull on it, the shut-off valve is revealed. Knowing where it is and how to close the valve could save you hundreds of dollars of water damage.

To shut off all of the water to your unit, turn it perpendicular to the pipe. The one below is shown OPEN.


Our next stop is the water heater. the water heater does two jobs. It supplies hot water to your spigots and also recirculates water to a heating unit located in your utility room.


Your heating unit is a hot water fan-coil unit located in the duct-work in the utility room. Fan-coil means exactly that. A fan blows air across the hot water coils and forces it through the ducts to your room registers. The same fan also blows air across another coil used for air conditioning in summer.

The water heater in your closet heats the water and maintains the tank temperature all year long. The water temperature can be adjusted but it really only affects the recirculated water that flows to the fan-coil unit. Gas is used to heat the water.

Hot water from the tank is mixed with cold water to reduce the temperature for safety. 


On the tank, you will see the recirculate inlet and outlet connection on the right hand side. There are two shut valves which can be used in summer to prevent water flowing to the heating coil


On the top you will find the cold-water inlet and hot-water outlet.

A high pressure relief valve is located on the front. Its job is to prevent the tank from erupting in case of a control malfunction. The plastic pipe leads the water down to a catch pan that is expected to minimize flooding in the event of a malfunction. NEVER stopper the relief pipe.

The temperature of hot water in the recirculating tank can be adjusted from the front control display. (OK, ask somebody if you're not sure that you know what you're doing.)

(This will not make your spigot water hotter. I'll get to that later.)

Find the operator manual. read it. .......

Now that you have read the manual, check the current setting. Press, both the "HOTTER" and "COLDER" at the same time, now you can adjust the RECIRCULATING (TANK) WATER TEMPERATURE. Chances are you do not need to change it. Unless you are unhappy with your heater's response, you should not touch it.  A lower stting canbe used in the summer since it is for tap water only. Please note, that it need not be higher than A. Someone in the building had it adjusted it to "C" and the heater popped its high pressure relief valve. Water. water, everywhere.

Recirculating water temperature control: It controls water that goes to the heater and in the holding tank.


The HOT water temperature for you spigots is controlled by MIXING VALVE above the water heater. Since the water exiting the heater is too hot for skin contact it is mixed with cold water. On one side cold water enters. On the other side, hot water enters from the water heater. The water that exits the mixing value is delivered to your spigots, shower heads, and washing machine. In most municipalities these safety mixing valves are required by code.


The spigot water temperature can be adjusted by turning the knob on the valve. Any adjustment should be made in small increments. This device is meant to prevent burns. Once again, read the manual.


Lastly, remember that we are burning gas all year long for hot water and heat in the winter. Gas is safe if all of the equipment is in proper working order. Your heater is equipped with a flame-safeguard control that will shut-off the gas is the flame is lost.


Go one step further, get a Carbon-Monoxide Gas Detector. Locate it nearby the water heater closet. Many people are asphyxiated by malfunctioning gas furnaces every year.

Best Regards, Uncle George


Send you letters to mc900@comcast.net


Saturday, February 7, 2009

Air Filters for Heating and Cooling Ducts


by George,

Have you changed your air filter in the past year? or ever?
This is one of those items that many of us just plain forget or don't know about.
Filters should be changed once every six months or more.

First, where is it?
The Dorchester model has its filter in the living room on the wall shared with the master bedroom. It is located below the thermostat. Yes, it's that big vent. The vent is the return air vent into which all of the room air recirculates. If it is dirty, very little air will flow.

Changing or checking the filter:
Turn off your heater or air conditioner to stop the fan and air flow before opening. There are two latches that secure the louvered vent. You may need to use a small screw driver to lever them open. Check the filter for dirt. It's probably more disgusting than you expected.
Please note, do not run your system without a filter. The filter prevents dust build-up on your coils which heat and cool your condo. They are not easily cleaned.

OK, Here's the catch. The size of the filter is not an off-the-shelf size: 16 x 24 inches. I went to two Lowes and two Home Depots. Neither had the size. The nearest standard size is 16 x 25. Let Uncle George save you some time. It won't fit! Luckily, I found a 16 x 24 at ACE hardware in Cambridge. I guess that someone else asked that they special order the size.

I paid $17.00 for the filter because it is a 3M Ultra Allergen filter. Nice for your health, but, not required to protect your equipment. I also found a few places on the web that sell them in six packs, but at the same price: no bargains.

I recommend going to the ACE hardware store. If we all buy them there, ACE will keep them in stock. They are located a block away from the WAWA.
ACE Hardware
802A Woods Road
Cambridge, MD 21613
(410) 228-9391

Also, it's a good idea to buy two, change one in the spring and one in the fall, when you change your clocks.

Have any other handyman tips? We anxiously await your comments.
Send to: marshycove900blog@comcast.net